Palette
The palette holds your project’s named colors, called swatches: “Company red”, “Company grey”, “Cream”… When an object’s color is linked to a swatch, editing the swatch recolors that object, on every texture of the fleet.
Why the brand is shared by elements
Section titled “Why the brand is shared by elements”Each vehicle has its own texture layout: the cab, the chassis and the trailer are unfolded differently, so a stripe drawn on one texture can’t be copied to the same place on another. What you can share is the look of your company, not where it sits.
That is what the Brand space gathers: the palette, the graphic and text styles and the symbols. They belong to the project, and each texture places its own objects that use them. Change a swatch, a style or a symbol once, and every texture follows.
Add a color to the palette
Section titled “Add a color to the palette”- Select an object with the color you want to keep, and click the swatch of its Fill or Stroke row in the inspector.
- In the color popover, under Brand palette, click Add to Palette (+).
The color becomes a new swatch, and the color you picked it from is linked to it. The same color is never added twice. In the Brand space, Palette also has a New Color button, which adds the current color the same way.
Apply a swatch
Section titled “Apply a swatch”In the Workshop, the Resources tab lists the project’s palette, symbols, styles and images. Its Palette section works like the palette of the color popover.
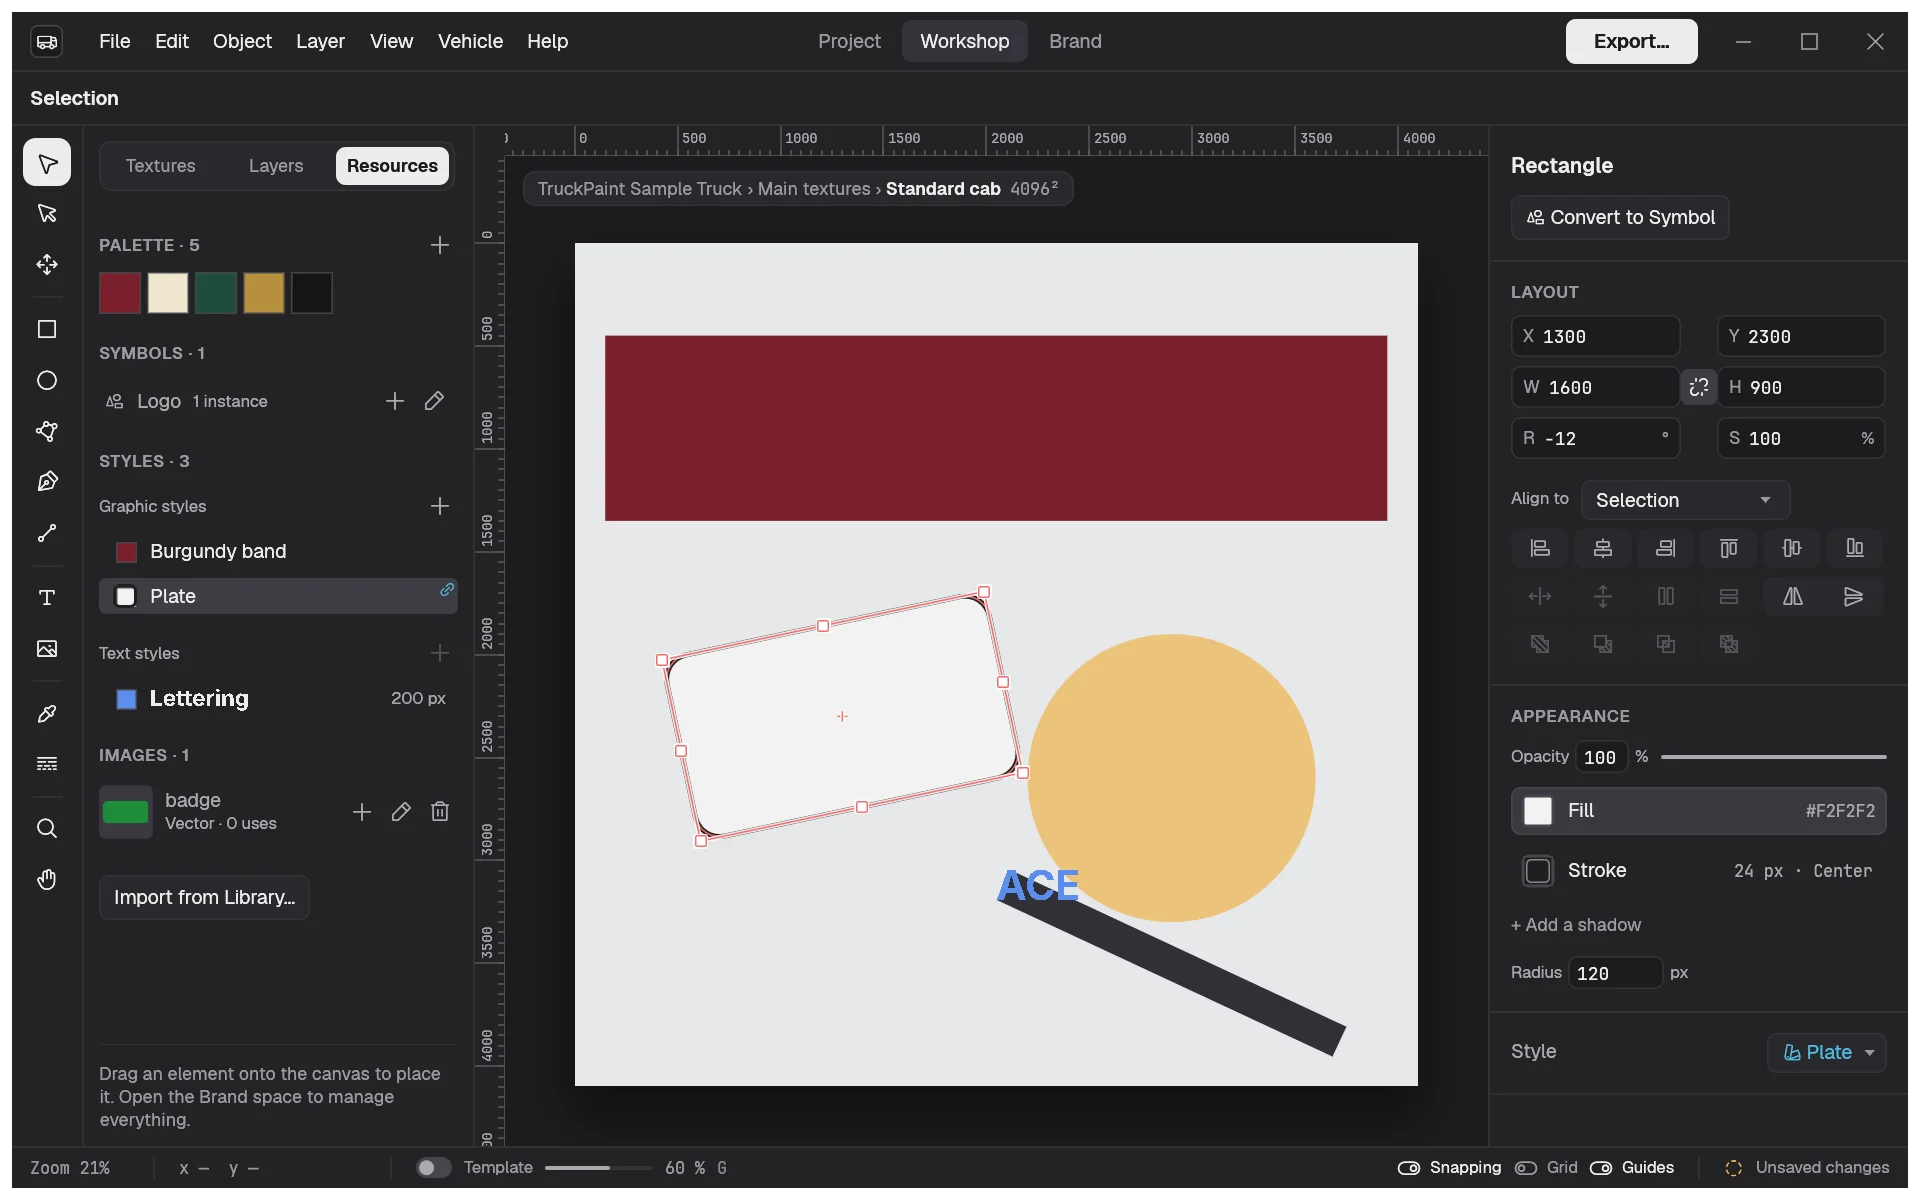
Select one or more objects, then click a swatch: its color goes to the fill or the stroke, whichever is the target (press X to switch), and is linked to the swatch. With a gradient, the swatch colors the selected stop.
A linked color shows the swatch’s name with a link icon in the Fill or Stroke row, and the swatch has a ring in the color popover. Picking any other color (a recent color, the picker or the eyedropper) unlinks it: the color then shows as a hex code.
Swatches can also color a stroke, a drop shadow, a gradient stop, a style, or an object inside a symbol. All of them follow the swatch.
Recolor the whole fleet
Section titled “Recolor the whole fleet”Open the Brand space from the space switcher, or press Ctrl+3 (⌘ on macOS). Each swatch card shows its color, its hex value and its usage, such as “5 textures · 11 objects”, or Unused.
- Open the swatch’s menu (…) and choose Edit Swatch….
- In the editor on the right, pick the new color or type its hex value. You can also rename the swatch here.
- Compare the Before and After previews, and check the impact: the number of textures and objects that will change, with a thumbnail of each texture in the new color.
- Click Apply to Fleet.
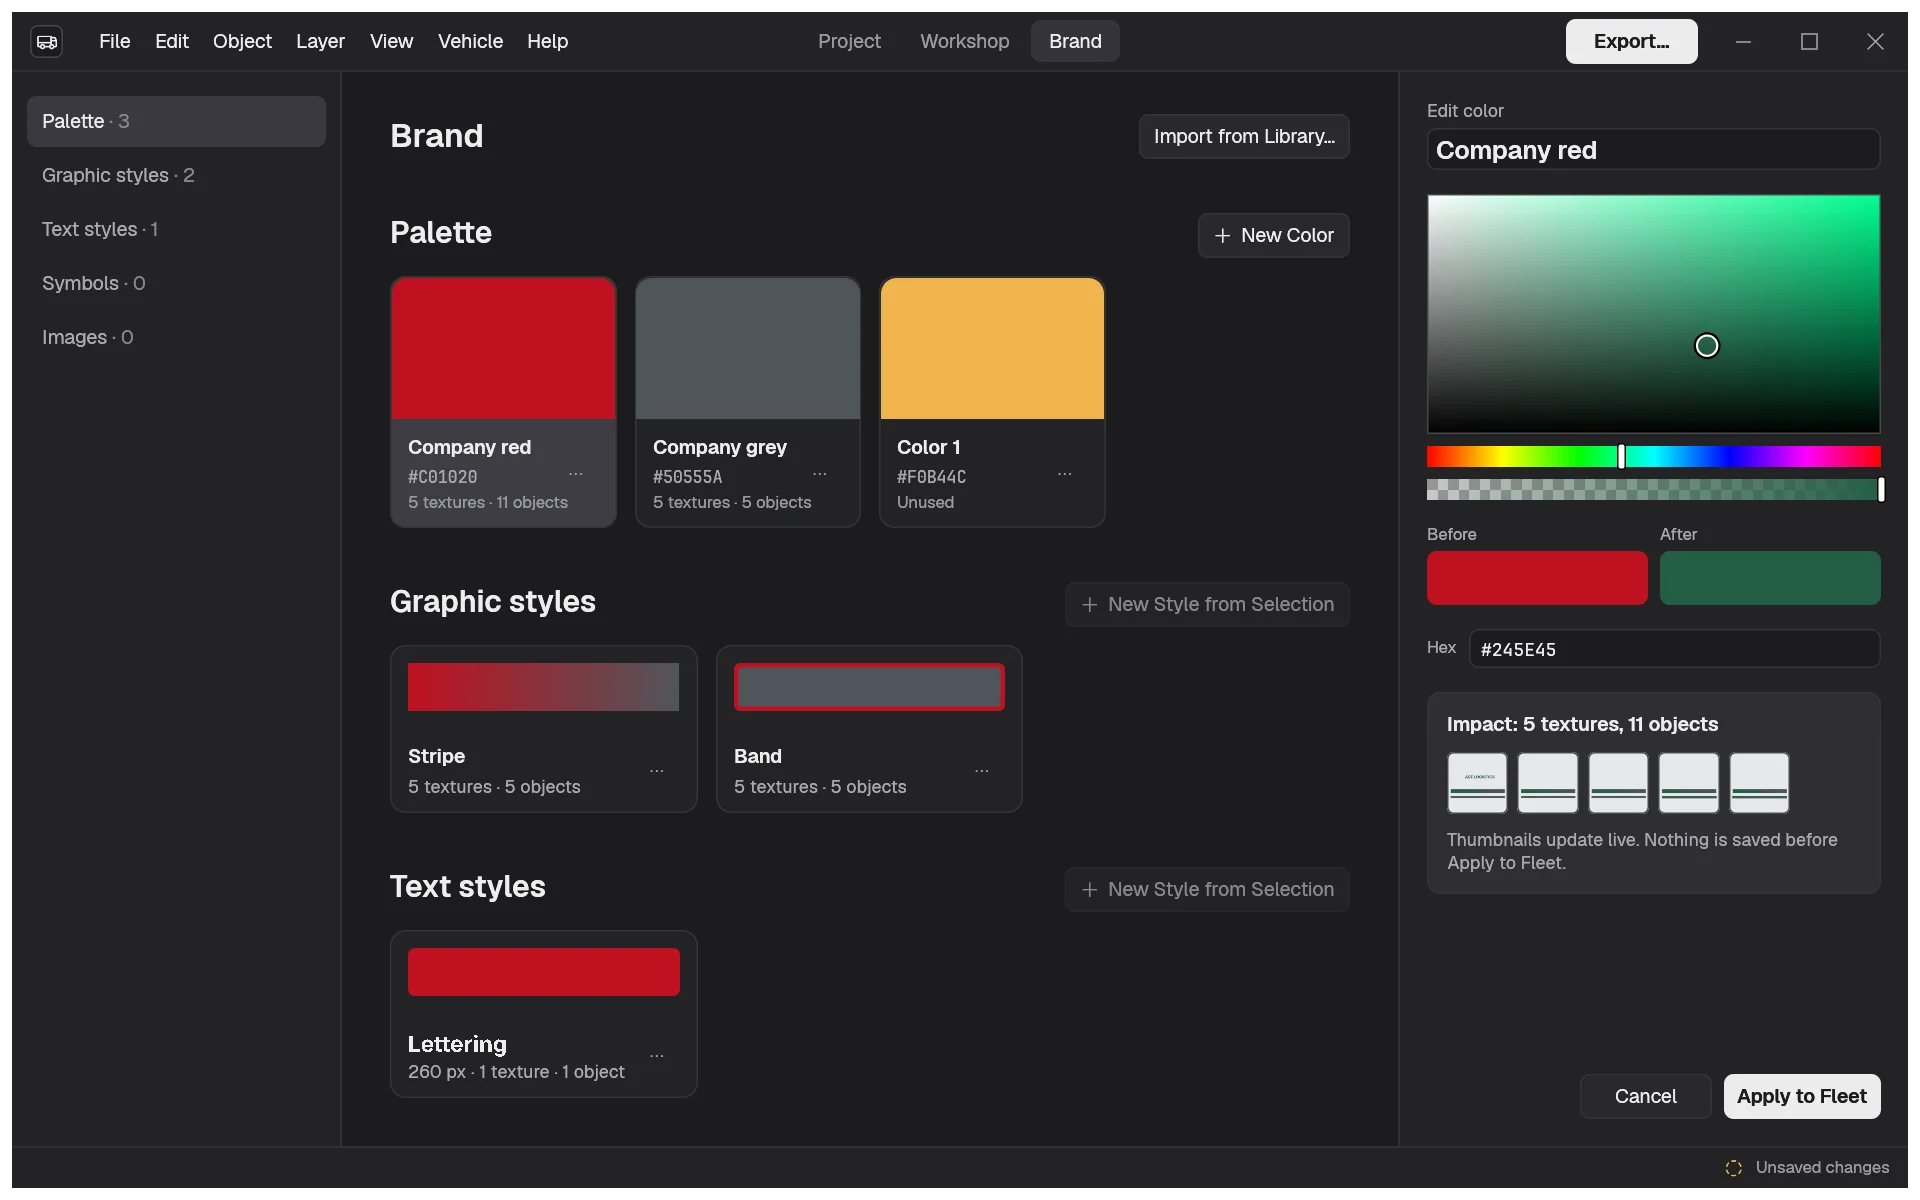
Nothing changes in the project until you click Apply to Fleet: Cancel or Escape closes the editor and leaves everything as it was. Once applied, every linked color takes the new value on every texture and stays linked, and one Undo restores the previous color everywhere.
Edit Swatch… is also in the swatch’s context menu in the color popover and the Resources tab; there, the same editor opens as a dialog over the Workshop.
Delete a swatch
Section titled “Delete a swatch”Choose Delete Swatch in the swatch’s menu. The objects keep their color, but they are no longer linked, so later edits won’t reach them. Like every palette change, it can be undone.
To reuse your swatches in other projects, add them to your library.