Layers
Each texture has its own stack of objects. The Layers tab of the left panel (key 2, or View › Layers) shows the stack of the active texture as a tree, topmost object first. Switch texture and the tab follows.
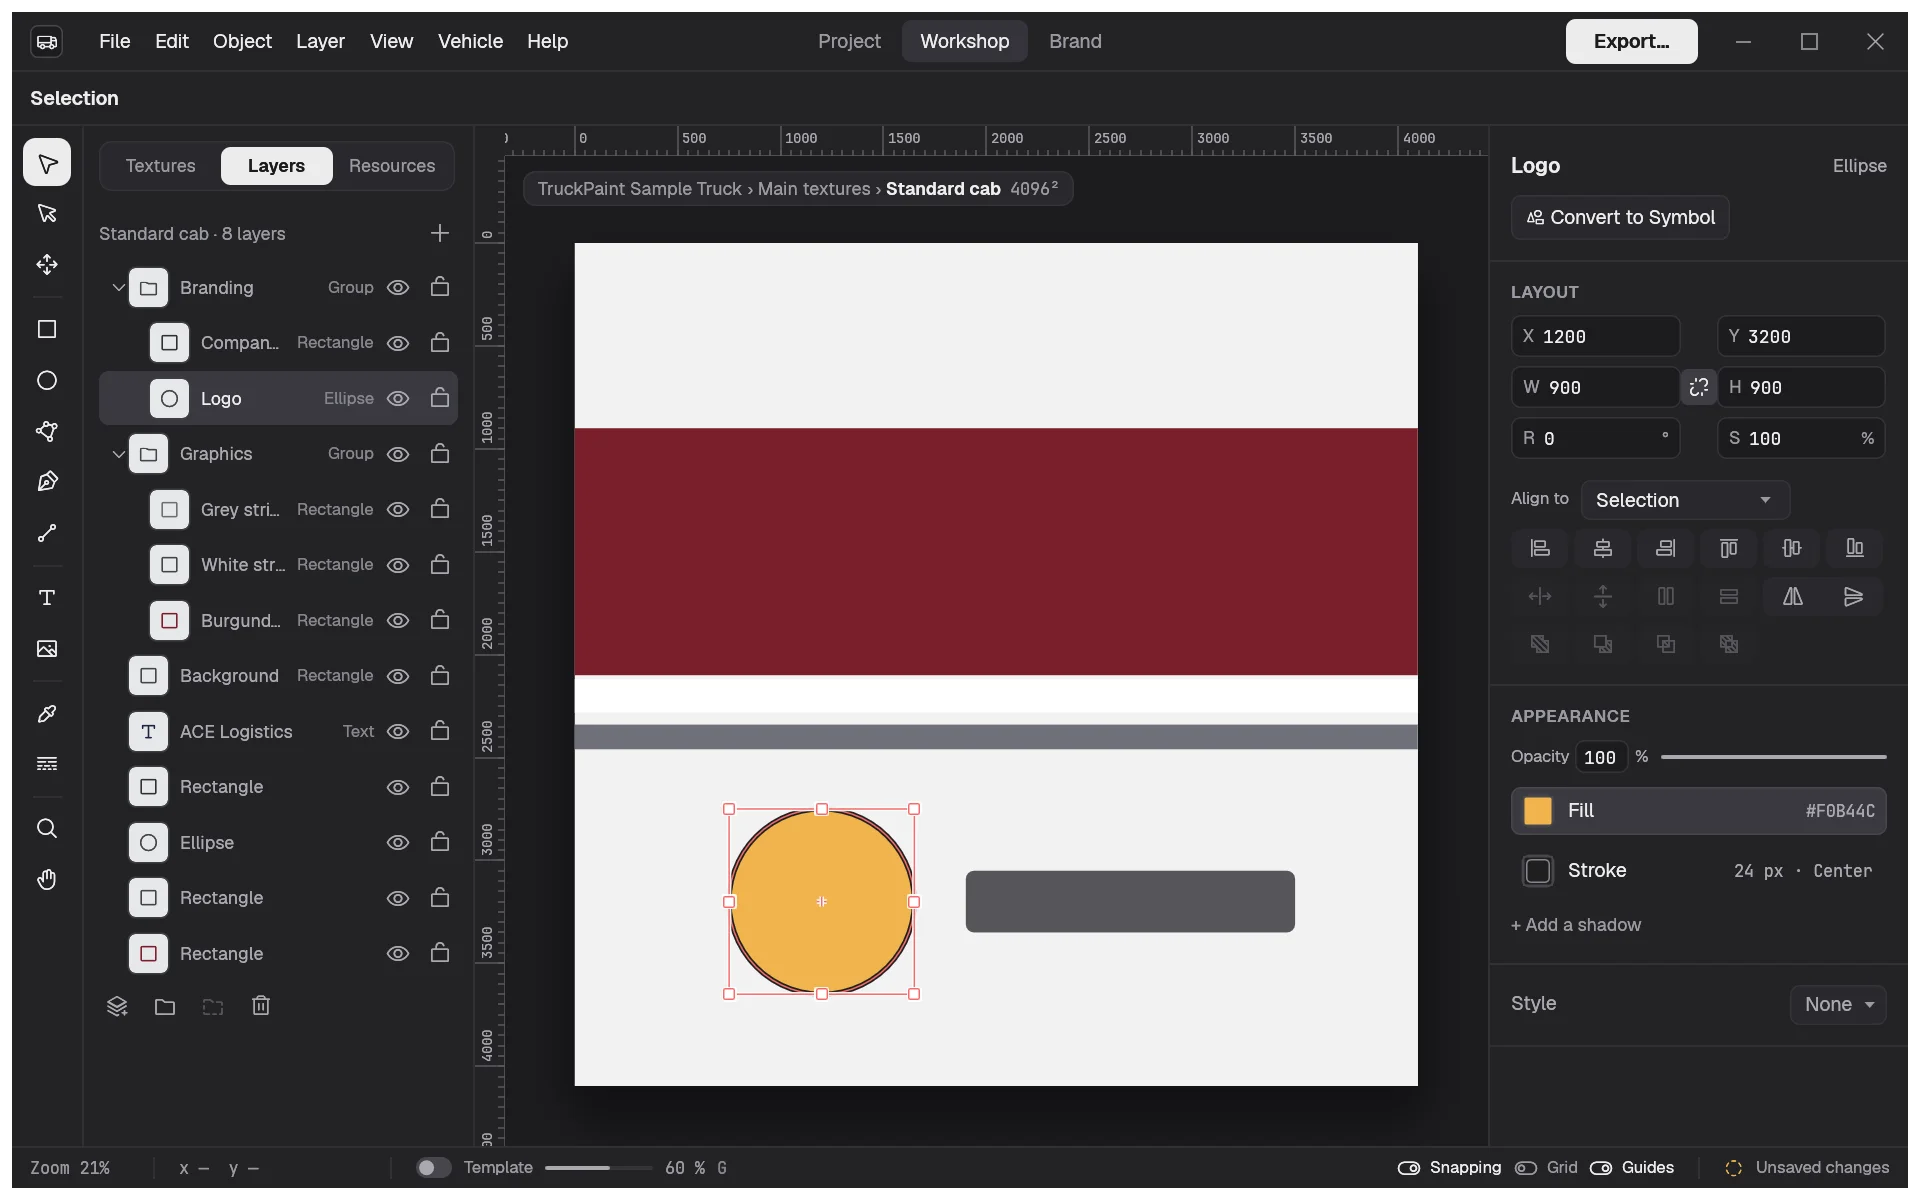
The header names the texture and counts its top-level objects. Each row shows the object’s kind icon, its name, an eye toggle and a lock toggle. A text without a name of its own shows its first line, so you can tell your lettering apart.
Select from the list
Section titled “Select from the list”- Click a row to select its object, even inside a group.
- Ctrl-click (⌘-click on macOS) adds or removes a row.
- Shift-click selects every row between the last clicked one and this one.
It works both ways: selecting on the canvas highlights the rows, and opens the groups that hold them.
Change the order
Section titled “Change the order”Objects higher in the list are drawn on top. To move them:
- drag rows up or down; a line shows where they will land. Several selected rows move together;
- drop rows onto the middle of a group row to put them inside that group, at its top;
- or use Object › Bring Forward (Alt+Ctrl+]) and Send Backward (Alt+Ctrl+[).
Group objects
Section titled “Group objects”Groups keep the parts of a design together: the stripes of a band, the lettering of a door. Clicking a grouped object on the canvas selects the whole group, so it moves as one (Ctrl-click reaches the object inside).
| Command | Shortcut | What it does |
|---|---|---|
| Group | Ctrl+G | wraps the selected objects in a new group |
| Ungroup | Ctrl+Shift+G | puts the group’s objects back in its place |
| New Layer | Ctrl+Shift+N | adds an empty group at the top, named “Layer 1”, “Layer 2”… |
| Duplicate Layer | duplicates the selected rows | |
| Delete Layer | deletes the selected rows |
Group and Ungroup are in the Object menu, the layer commands in the Layer menu. All of them are also in the tab’s right-click menu and its footer buttons, and the + button of the header adds a layer.
New shapes go at the top of the active layer: the selected group, or the group holding the selection. Select a layer before drawing to draw into it.
Collapse a group row to keep a long list short; selecting one of its objects on the canvas opens it again.
Hide and lock
Section titled “Hide and lock”- The eye hides an object, or a group and everything in it. A hidden object stays in the list but isn’t drawn on the canvas, can’t be clicked, and isn’t exported. A texture whose objects are all hidden counts as empty, and is exported with the game’s color.
- The lock keeps an object from being selected or changed on the canvas, which is handy for a background you keep clicking by mistake. Locked objects can still be selected in the list, to unlock them.
Hiding or locking a selected object deselects it.
Rename
Section titled “Rename”Double-click a name, or right-click the row and choose Rename. Type the new name and press Enter; Escape cancels. An empty name goes back to the default one, such as “Rectangle” or “Group”.
Clear names pay off when you come back to a livery months later.
Reordering, grouping, hiding, locking and renaming can all be undone, one step each.