Custom vehicles
Every project starts from a vehicle. When the one you want has no package, for example a truck released in the last game update or a vehicle from a community mod, make it yourself with Custom Vehicle…. You give TruckPaint the template files and the game data, and it builds and installs a package, checked exactly like any other.
Open the Custom Vehicle dialog
Section titled “Open the Custom Vehicle dialog”Custom Vehicle… is offered in three places:
- under the vehicle list of New Project;
- in Add Vehicle…, where the game is the project’s game and can’t be changed;
- in the Vehicle Library.
Describe the vehicle
Section titled “Describe the vehicle”Fill in:
- Name and Brand, both required;
- Kind: truck or trailer;
- Game: ETS2 or ATS;
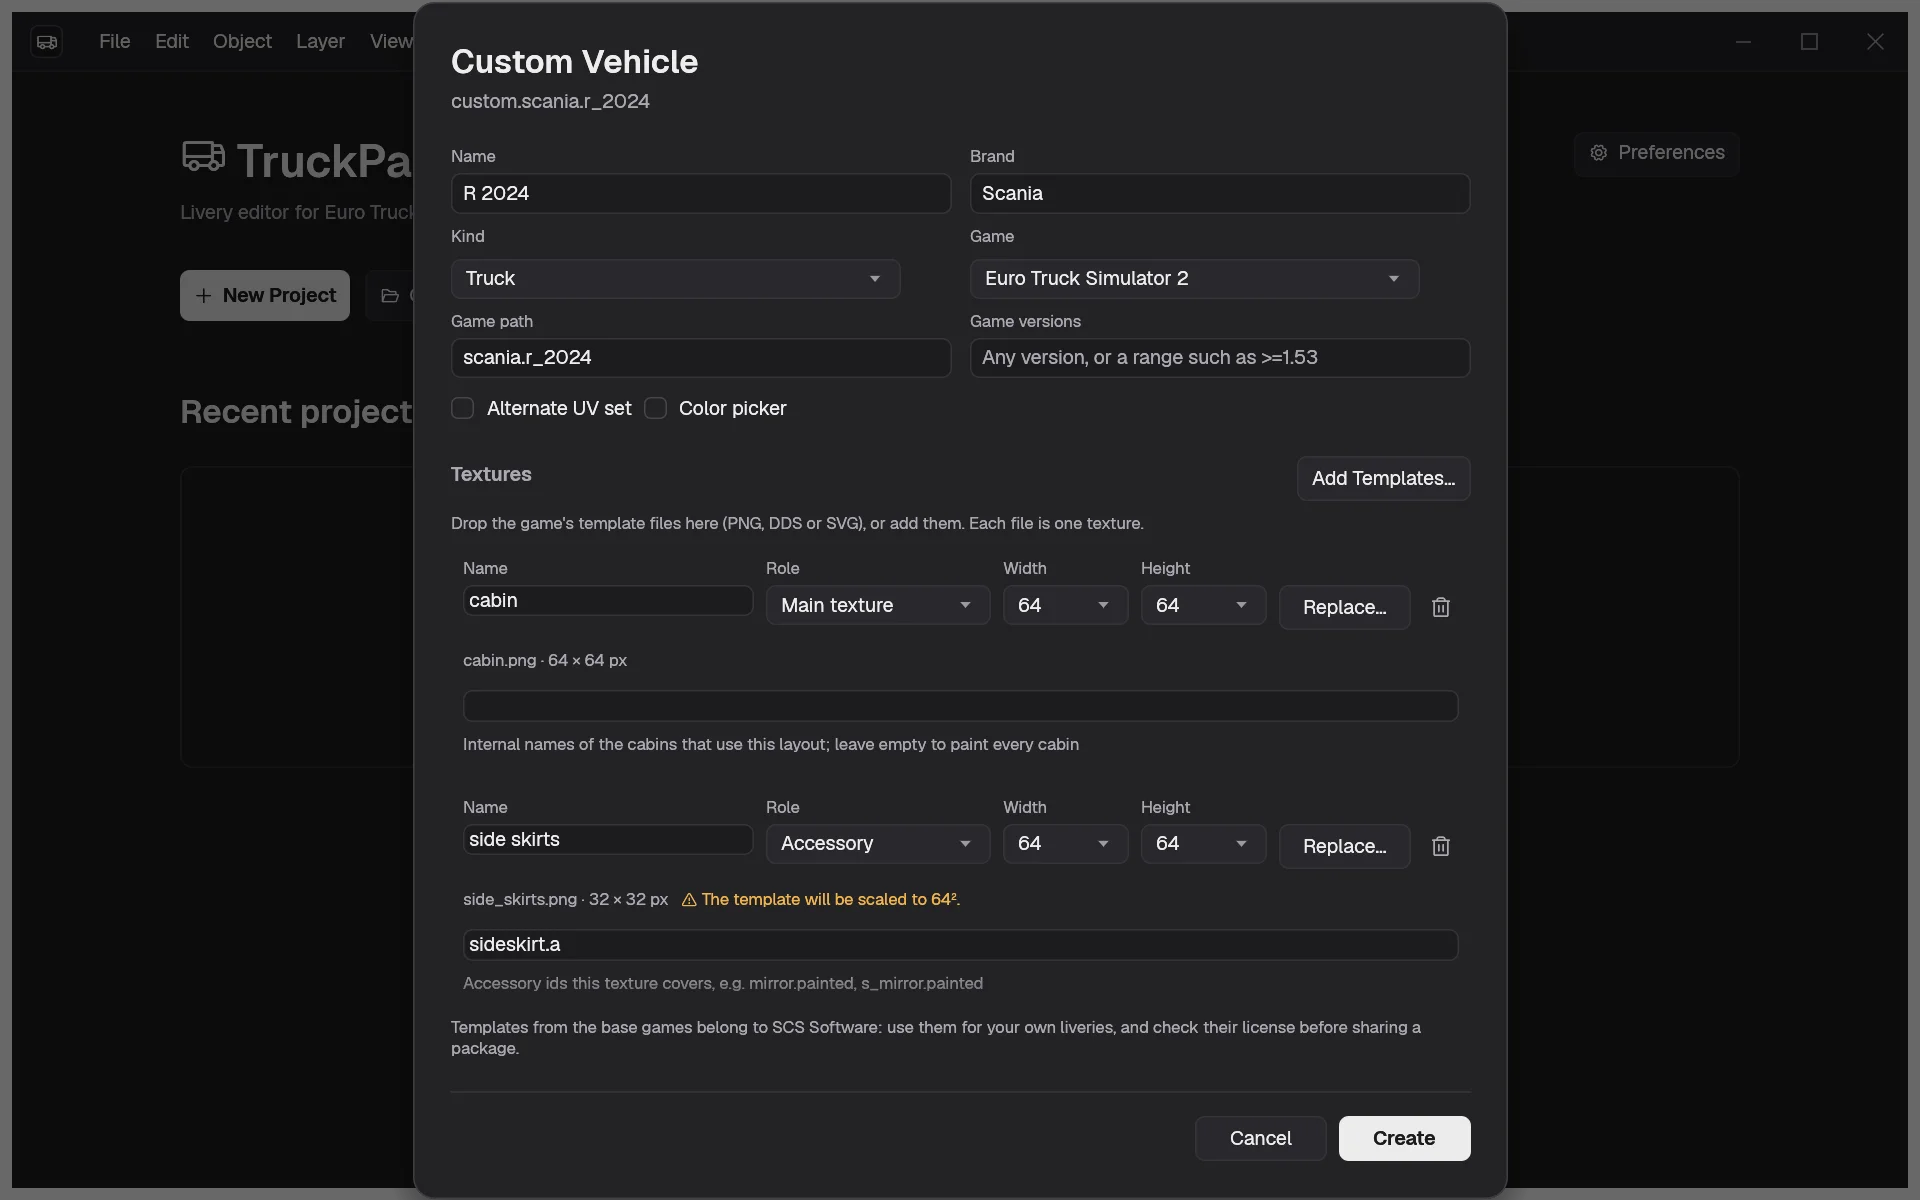
- Game path: the vehicle’s path in the game’s definitions, such as
scania.r_2016; - Game versions, optional: leave it empty for any version, or type a range such as
>=1.53; - Alternate UV set and Color picker, unchecked unless the vehicle’s paint jobs use them (some ATS trucks use the alternate UV set).
Add the templates
Section titled “Add the templates”Drop the game’s template files on the dialog, or click Add Templates…. TruckPaint reads PNG, SVG and DDS files (BC1, BC2, BC3, or uncompressed RGB and RGBA). Each file becomes one texture row with:
- its name, taken from the file name, which you can edit;
- its role, Main texture or Accessory. The first file becomes the main texture, the next ones accessories; change the role if needed;
- its game ids;
- its size, taken from the image and rounded to a power of two from 64 to 8192. The row warns you when the template will be scaled.
Replace… picks another file for a row, and the remove button takes the row away. A file that can’t be read is not added, and the dialog says why.
Give the game ids
Section titled “Give the game ids”The game ids tell the game what each texture paints, so the mod can work:
- A truck whose cabins share one layout has one main texture. Leave its game ids empty: it is painted on every cabin.
- A truck whose cabins have different layouts has one main texture per layout. Each one needs the internal names of the cabins that use it.
- A trailer has exactly one main texture.
- Every accessory needs the accessory ids it covers, such as
mirror.painted.
The dialog checks the form as you type and shows each problem next to its field. Create is enabled once there is none.
Create it
Section titled “Create it”Click Create. TruckPaint builds the package, version 1.0.0, converting DDS templates to PNG, and installs it in your library. You are back in the dialog you came from: in New Project and Add Vehicle…, the new vehicle is checked, with its first main texture and its accessories; in the Vehicle Library, it is listed.
The package’s id is made from the brand and the name: “R 2024” by “Scania” gives custom.scania.r_2024. If that id is already installed, TruckPaint refuses to create it again: make a new version instead.
Make a new version after a game update
Section titled “Make a new version after a game update”When a game update changes your vehicle, open the Vehicle Library, choose the vehicle and click New Version…. The Custom Vehicle dialog opens, filled in from the newest version, with a Version field that proposes the next one (1.0.0 gives 1.1.0).
Replace the templates that changed, add or remove rows, then click Create. The new version is installed next to the old one. A texture whose template you replaced is marked as having a new layout, so in your projects Update Template… moves the vehicle to the new version and tells you which textures to check.
To share a custom vehicle, use Export… in the Vehicle Library: it saves a .tpv file that anyone can install.